Welcome to a culinary fusion where the flavors of the Middle East and America collide, creating a tantalizing harmony of tastes and textures. Here is a delightful twist on a beloved Middle Eastern sweet. This unique dessert combines the richness of a classic American cheesecake with the delicate sweetness of Kanafeh, a traditional Middle Eastern pastry. Prepare to embark on a culinary journey that will captivate your taste buds and ignite your senses.
The journey begins with a buttery and crispy crust, crafted from shredded phyllo dough, known as kadaif pastry. Infused with the aromatic essence of rosewater and a hint of lemon juice, this crust is a perfect complement to the creamy, indulgent filling that awaits. As you take your first bite, the contrasting textures of the crunchy crust and velvety filling will dance on your palate.
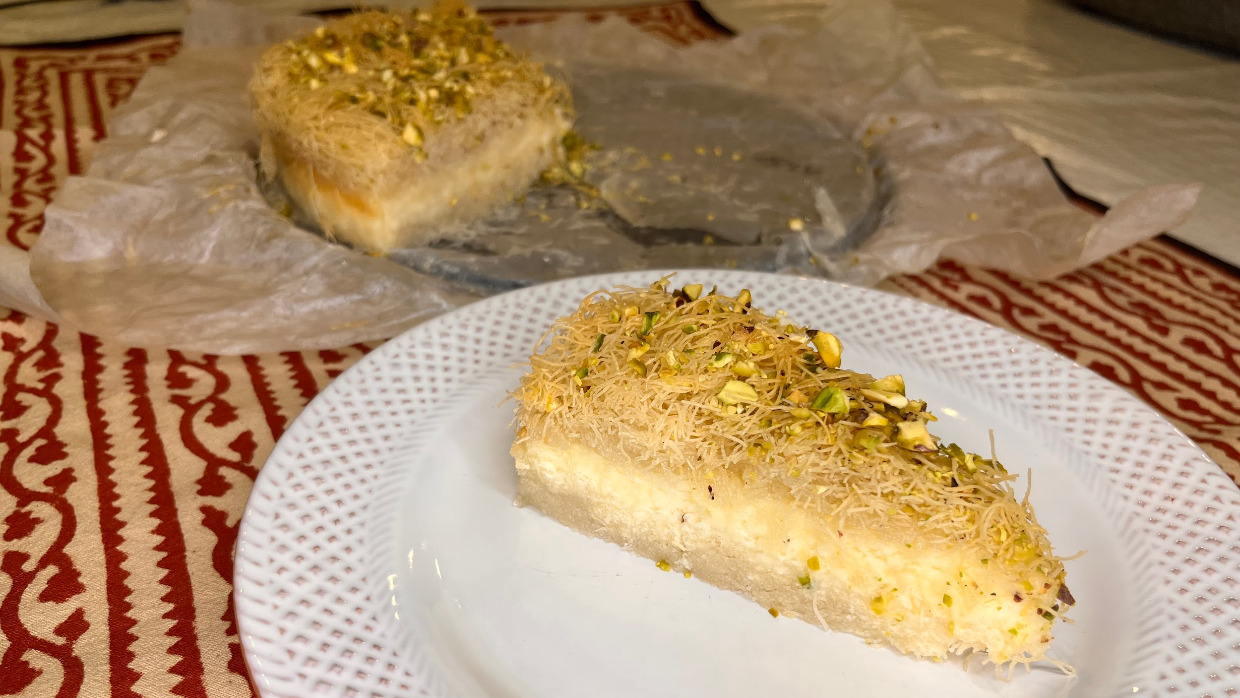
To add a final touch of Middle Eastern influence, we garnish our Kanafeh Cheesecake with crushed pistachios. These roasted, unsalted pistachios bring a delightful nuttiness and a vibrant green color, making this dessert visually stunning and utterly irresistible.
Ingredients
For the crust
- 1 ¼ cup sugar
- 1 cup water
- 1/2 tablespoon lemon juice
- ¼ teaspoon rosewater
- 7 ounces butter melted
- 10 ounces kadaif pastry shredded phyllo dough
For the filling
- 16 ounces 2 8-oz blocks cream cheese, at room temperature
- 1 cup sugar
- 1 ½ tablespoons all-purpose flour
- 2 teaspoons rose water
- ½ teaspoon packed lemon zest from 1 lemon
- 3/4 teaspoon fresh lemon juice from 1 lemon
- ¼ teaspoon salt
- 3 large eggs
- ⅓ cup of crushed pistachios roasted, unsalted
Nutritional Facts
Instructions
- Preheat oven to 325°F/160C
- In a heavy-bottomed saucepan, place sugar, water and lemon juice. Bring to a boil and then simmer on low heat for approximately 10 minutes or until the liquid has become a syrup. Remove from heat and leave to cool.
- When the syrup has cooled, add the rosewater and set aside to be used later.
- Use a little of the butter to grease an 11-inch springform pan.
- In a large bowl, break apart the kadaif pastry until all the shreds are loose. Mix the rest of the melted butter in, using your hands, so the pastry is well coated.
- In the bowl of an electric mixer fitted with the paddle attachment or beaters, beat the cream cheese, sugar, and flour together on medium speed until very smooth, about 2 minutes. Scrape the bottom and sides of the bowl to be sure the mixture is evenly combined. Add the rose water, lemon zest, lemon juice, and salt; beat on low speed until just combined. Add the eggs, mixing on low speed until incorporated, scraping the bowl as necessary. Make sure the batter is uniform and smooth but do not over-mix.
- Set the cheesecake pan on a large sheet pan. Layer half the kadaif pastry on the bottom of your pan, pack it tightly for minimal leakage. Pour the batter on top of the crust. Bake for about 15 minutes until cake is just starting to set. Top with remaining kadaif and bake for another 45-60 minutes, until the cake does not wobble.
- Remove the cake pan to a wire rack. Sprinkle ground pistachios on the top. Pour the rosewater syrup evenly over the cake. Transfer to refrigerator to cool for at least 8 hours or overnight.
- When ready to serve, if necessary, run a thin-bladed knife around the edge of the cake to make sure it's not sticking to the sides before removing sides of springform pan and serving.